Wednesday, January 23, 2013

Tag Time fpr PaperHaus magazine

Hello everyone! Hope the start to the year has been great for all. Lisa here with a tag I made for my DT at PaperHaus Magazine. I have to say that when I start them I never know where I am going to end up.


First I started with some Maja design papers Which you can find in my store, The Shabby Horse Cafe and cut out the base of the tag. Then I start cutting smaller pieces for layers. Once I have the layers I am happy with I distress, ink and mist each individual layer. After that I arrange them where I like and glue them down slightly. Then if it looks kinda empty I will find a mask I like and gesso a pattern on it.

Then start looking at my stash and decide what I should use. In this case I used Prima and Petaloo flowers, some leaves I made, some chipboard clock hands, hand dyed seam binding and the beaded thingy is one of those wine glass markers I found at a thrift store.


I cut out a title I liked and wala I was done!! I hope you enjoyed this and thank you for visiting!!!

Tuesday, January 15, 2013

The Paper Mixing Bowl--Jan. Reveal "Yesterday"

Hello and welcome. This is my DT take one the colors and sketch for this months recipe at  The Paper Mixing Bowl  I also used a metal charm from Handmade Halo. Here is the recipe for this months challenge. I LOVE these colors and the sketch and it was fun to work with!!

You ever have those pictures where you remember exactly where, when and why it was taken?? This is one of those for me!! One of my favorite picture of my son and I. This was taken by a river we liked to explore and was taken about 23 years ago. I remember the details to the "T" and of coarse it seems like it was yesterday!!!
I started out with some blue paper and didn't like the color so between some paint, ink and distress stain I got it to where I was happy with the color. I did manage to get most of the recipe on there. I have hidden journaling on the tag under the picture, a message to my son!!
Thank you so much for stopping by. I truly appreciate it. I hope you are having a wonderful start to the new year!!!

Monday, January 14, 2013

Card for Stuck On You Sketches

Hello....here is a card for A challenge over at SOUS. My first time entering this challenge. I really liked this  sketch. Anywho here is the sketch:
And here is my take on the sketch!!! Thank you if you have stopped by!!!


Saturday, January 12, 2013

Buggie, Punkie & Hotrod OUAS and CSI

Morning!! I hope everyone is having a wonderful start to the new year. I combined 2 challenges with this layout. First challenge is a sketch challenge at OUAS and the other one is at CSI my first time playing there and the colors were beautiful!. Journaling is a challenge for me!! SO this is what I came up with...
And here are some close ups:
You could add recipe journaling and add a scallop. Metal was some evidence along with flowers, fabric and texture paste.
This is my daughter (Punkie we called her) and now we call my grand daughter Buggie cuz she is just cute as a bug!!! This was her 1st birthday and of coarse Hotrod had to give her a pony ride!!
Here is my hidden journaling that tucks behind the picture. Thanks so much for stopping by. Here is the sketch for OUAS
I flipped it to the left!
And here is the case file.....
Well thank you for stopping by..Have a wonderful weekend.


Saturday, January 5, 2013

PaerHaus Dt project

Hello all!! Here to share with you an Off the Page Project tutorial with you. These are so fun to do and if you haven't tried one now is the time to try!! I created this for PaperHaus Magazine .
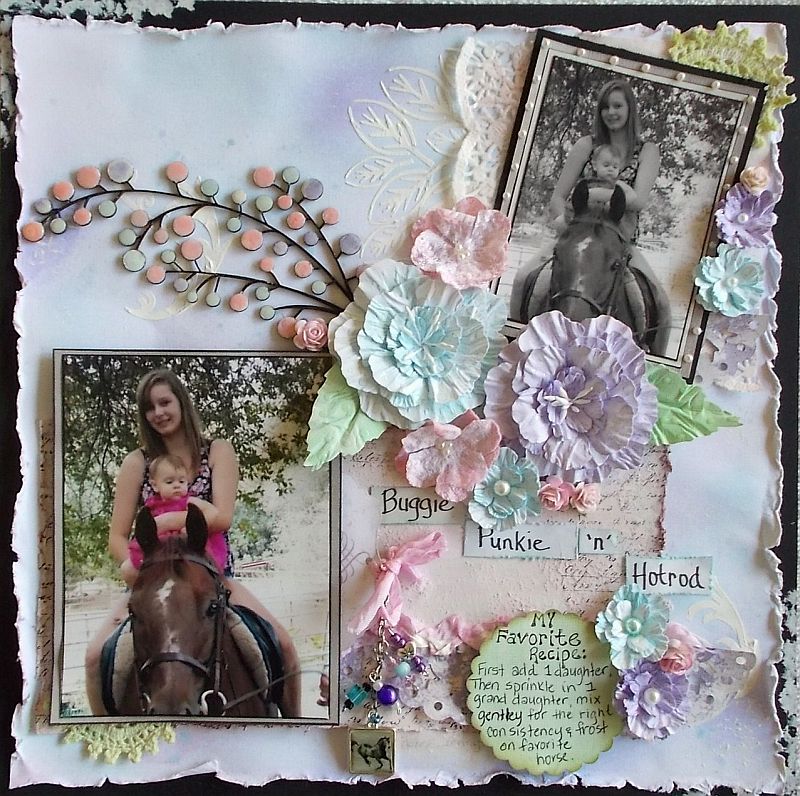
Here is a photo of the finished project. I made the flower at the top right and tucked a Prima wooden clock behind it. Also used a Vintage trinket. The bottom left flower is a Prima along with some other flowers from my stash.
 Here is another photo of it opened with different shaped pockets and the various tags!
 First decide on which project you would like to use. I used a Kasiercraft wooden book.
 Then choose which paper you would like to use. I used some Prima. Then measure and cut paper to fit. This happened to be an 8x8 project so it was very easy to cut the paper to fit. Be sure to cover both sides.
 Then adhere the paper using your favorite adhesive. Be careful to keep the paper in order in which it goes on. I used a pattern that I could cut down the middle and it would show up on both sides of the cover.
 Once you have adhered the paper distress the edges and if your distressing tool won't fit on the edges just use some old scissors.
Then of coarse ink if desired!!
 Now here is where it gets really fun...you can ink, mist, gesso, use gelatos or whatever you like to add some texture or color to your project. I happened to use some gesso, a stencil and paint for this one.

 Once you have your background to where you are happy it is time to add some pockets to fit tags and whatever you decide to put in them. I like to cut different shapes, like a "V" or use some designer scissors to make the top edge of the pocket. This one I chose a "V" shape.
 Then add some lace and pearls for the edge of the pocket. I decided to stencil a little flourish and I cut out the beautiful word, inked the edges and added some bling.
Make pockets on each side and the middle of the inside and then the fun part....making some tags for all the pockets.  Leave some spaces for little pictures and some spaces to journal on. It is easier than you think to make these and they are really a blast to make. Need some inspiration?? Go to the magazine and look around, you will find more than a ton there!!! I hope you enjoyed my tutorial and if you have any questions please just ask!!
Hope you are having a wonderful start to the new year!!!

New "Grab Bags" in the store..

Hi there, Hope everyone is having a fantastic day...Here in California we have not really had a winter yet...waiting on some most needed ra...