Friday, April 27, 2012

Tags

I am doing a quick drop off. Life has been quite busy lately. I really do enjoy making tags and these I made for a class I teach.
I did forget to get close ups but I think you get the idea of things. I do appreciate you stopping by here on my little blog!!! Hope the weekend is good to you!!!


Monday, April 23, 2012

You Make Me Laugh!!!

 Here is a layout of my Granddaughter. I guess I was teasing her by telling her to blow on the flower, she thought it was one of the fairy ones!! I was lucky to capture both of these pictures because they really tell the story. I was laughing pretty hard!!! Mean aren't I!! She is so cute!
I used some Prima paper, handmade the the flowers except the 2 dark pink ones.

A close up of my flower and the chipboard flourish is from 3tails craft. You can find the chipboard in my webstore along with other scrap goodies.
And last I used some beading I had in my stash. I always appreciate you stopping by. Have a great week!!!

Saturday, April 7, 2012

Fresh Start

Hello peeps!!! Here is a layout I made for the challenge at The Paper Mixing Bowl . I like they way they have recipes to follow along with a sketch. This is my take on the April challenge title Hot Cross Buns!!
Here are some close ups of some of the ingredients!! Edge or corner punch.

Chipboard elements. I painted these corners white and added glossy accents to the for an extra sheen, also it called for sewing and liquid pearls.
Doilies and oval elements are just a few more ingredients..So come on over and play!!! It really is a lot of fun!!!
Well thats it for now...Thanks for stopping by.  You all have a great weekend and a wonderful week!!!

Tuesday, March 27, 2012

Shabby Banner

Hello peeps!!! Hope you are all well. Here is a banner I made for fun and my etsy shop. Just a quick drop off today. Have a busy day today. Have a great week!!!!
And a couple of close ups. Thanks to those who visit!!!!
Take care,

Tuesday, March 20, 2012

Libester blog award

Today I received a wonderful little surprise from Norma Gomez.. She is a fellow scrapper and has a really great blog; so head on over and check it out: Just click on her name!!
Thank you so much Norma!!!! I really appreciate it!

 "Liebster" is German for "Dearest". The award is a  "Share the love arrangement", given to inspirational bloggers with less than 200 followers. Here is the to do list for any of the  "Liebster" blog award recipients. 

1. Thank your Liebster Blog award presenter on your blog.

2. Link back to the blogger who presented you the award.

3.Copy and paste the award on your blog.

4. Present the Liebster Blog Award to 5 bloggers with less than 200 followers.

5. Let them know they have been chosen by leaving a comment on their blog.

I am happy to now honor some fairly new bloggers with this award...
 I'd like to pass this award on to these inspiring ladies:
2. Stacey, Oh Schwiet Scrap
4. Cheryl, Cheryl's Passion
I hope you enjoy ladies!!!!

Monday, March 19, 2012

For Scrap class!!

Hello...here is a page I did for the class I teach and for a challenge over at The Paper Mixing Bowl . I thought it would be fun to play along. It called for chocolate and I only have a little but this is my take. I used the new Bobunny Garden papers. I just love these!!! Thank so much for taking a peek, I do appreciate it!!
I hope you all have a grand week!!!!


Wednesday, March 14, 2012

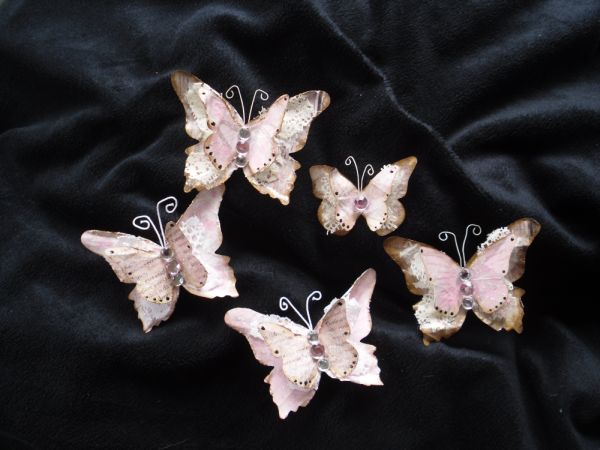
Shabby Butterfly tutorial

SHABBY BUTTERFLY TUTORIAL
Supplies needed
2 large butterflies
2 med. butterflies
Strong glue
Antenna wire
Gesso
Acrylic paint of choice
Scissors
Lace
Stickles
Gems for body
First lightly distress edges of butterflies and then lightly ink the edges.
Fold up the butterflies. I like to make the creases go the same way as the vein would. I fold the butterfly in half first (so wing to wing are together) then angle the folds,
so they come out looking like this.
Now using a thin strip of glue down the body line, adhere the medium butterfly to the large one taking care as to not spreading the glue under the wings. I use my fingernail, or tooth pick and run it down the body line. Let the glue set.
Get some gesso and paint and dab the paint into the gesso to lighten it up a bit and then dab on the butterfly wings. I also dabbed on the smaller wings a little. I could of done this step before I glued them together but I didn't so hey this works to!! Set aside to dry for a bit.
To make the antennas, you can use various items for instance the stem off one of your paper flowers. In this case I used white floral wire. Cut about 4 inches, fold in half and turn down the ends. You can use anything for this. I used my needle nosed pliers. I like them to look different and not all the same to give the butterfly some personality. (did I just type that!!)
For the lace I use ruffled lace. It makes the wings pop up a bit. Cut a 2 inch length and cut to shape the wings. This does not have to be perfect as you can see! Do not cut the seam off, cut away from the seam.
Use a strong glue for this next step. Hold the smaller wing up and put up and put a line of glue right next to the body line and place your winged shaped lace on top of the glue. 
Try not to push the lace towards the body and squish the glue towards there, you don't want the wing to stick to it. Same procedure on the other side.
To attach antenna cut a scrap piece of paper keeping it small enough to "hide" behind the butterfly and put a blob of strong glue on it. Place the antenna on top of the glue.
Then place the butterfly on top of that squeezing the glue around to get a good hold. Let set for a minute or two.
The adhere the gems to make the body, or whatever you choose to use for that. Then I add glitter and walla you have a butterfly. You can do this in all kinds of sizes.

Hope you like this tutorial. This is my second one so I am still very new to this. Have fun!!!!

 Wow do people still do blogs!!! I guess so since I am here...still kinda old school I guess. Thought I would update. Even though I don'...